Choosing new windows can feel straightforward until the samples, ratings, and installation details arrive. A bright showroom may hide the draft you notice beside a bedroom window in January. This guide introduces seven practical tips for choosing quality home windows, with attention to performance, durability, and fit. No single product suits every house.
Building-science expert Joseph Lstiburek’s work supports a useful principle: a window’s performance depends on the surrounding assembly, not just its frame. That is a paraphrase, not a direct quotation. It points to a detail homeowners sometimes overlook: even a well-made window can disappoint if it is poorly sized or installed. Ask about energy-performance ratings, glass options, frame materials, warranties, and the installer’s process. Compare specifications for your climate and room conditions, rather than relying on broad claims such as “most efficient.”
Look closely. Feel the sample. Ask what the warranty excludes. These small checks can clarify what a product will—and will not—do. The tips ahead also cover ventilation, maintenance, noise, and overall cost, so the decision reflects daily use as well as appearance. A lower purchase price may not mean better value over time, but a premium label alone proves little. I would not treat any checklist as a substitute for a site-specific assessment. Still, informed questions can make the choice less confusing and help you discuss options clearly with a qualified window professional.
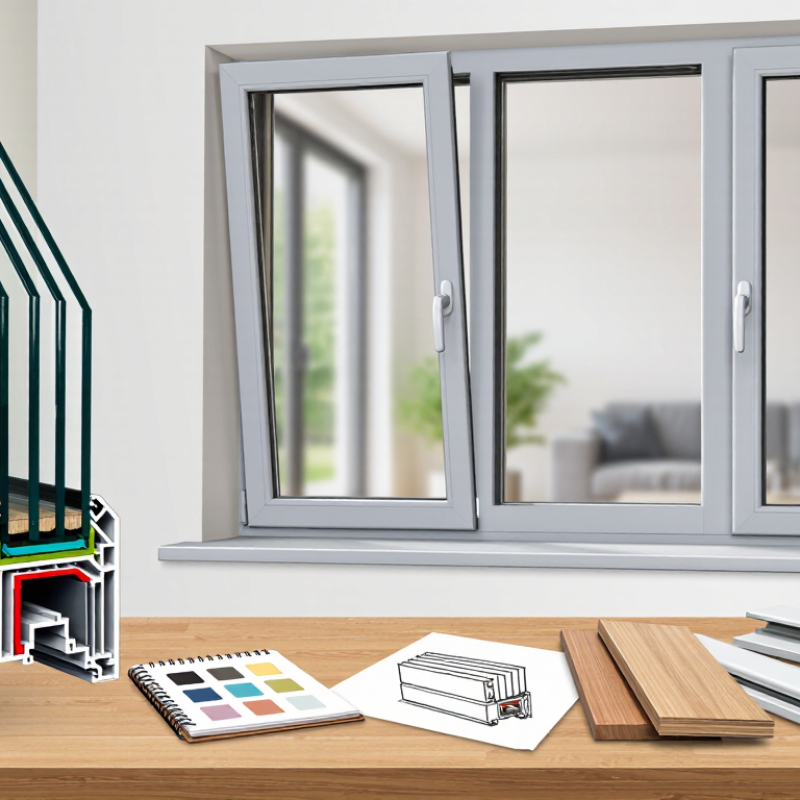
Before comparing frame materials or glass packages, check your local climate and the direction each window faces. The U.S. Department of Energy’s Energy Saver guidance estimates that heat gain and heat loss through windows account for 25–30% of residential heating and cooling energy use. That is a substantial share, though the figure describes homes broadly—not a guaranteed saving for every replacement.
In cold regions, a lower U-factor can help limit heat escaping through the glass and frame. In hot, sunny areas, a lower Solar Heat Gain Coefficient (SHGC) can reduce unwanted solar heat. Coastal homes, high-altitude locations, and shaded streets may need different choices, even within the same climate zone. Read the National Fenestration Rating Council label: its certified U-factor and SHGC make products easier to compare. Check both values. One number cannot tell the whole story.
A sunny living room may benefit from different glazing than a north-facing bedroom. DOE guidance also recommends considering air leakage, installation, and shading—not just the window’s rated performance. A carefully rated unit can still underperform if gaps around its frame let drafts through. The label matters, but so does the fit. I’d avoid treating the 25–30% figure as a promise of savings; real results depend on the existing windows, weather, and how the home is used.
7 Tips for Choosing Quality Home Windows
Compare NFRC U-Factor and 0–1 SHGC Ratings for Your Climate Zone
Window labels help compare products using consistent measures. NFRC-rated U-factor describes heat flow through the whole window; lower values mean better insulation. SHGC, shown from 0 to 1, indicates how much solar heat enters. The U.S. Department of Energy’s Energy Saver guidance estimates that windows account for 25–30% of residential heating and cooling energy use. Small differences matter.
Tips: Compare whole-window ratings, not center-of-glass claims. Favor lower U-factors where winter heat loss is a concern. Consider lower SHGC where summer sun drives cooling demand. In colder zones, useful winter sun may support a higher SHGC. Check orientation: a south-facing window gets different sun than a shaded north-facing one. Match ratings to your climate zone and household comfort needs. Verify the exact product’s NFRC label before ordering.
Climate zone is a guide, not a complete answer. A west-facing room with strong afternoon sun may overheat, even in a cooler region. Conversely, deep shade can change the trade-off. The DOE and NFRC provide useful starting points, but local conditions, glazing area, and shading also affect performance. It is easy to overfocus on one number; weigh both ratings together.
How to use these ratings: The chart shows typical rating scales, not climate-zone requirements. A lower U-factor means less heat flows through the window and is often a priority in cold climates. SHGC measures how much solar heat enters: lower ratings can help limit unwanted heat in sunny, cooling-dominated climates, while higher ratings may be useful where passive solar heat is desirable. Compare NFRC-certified ratings and check local energy codes, window orientation, and shading before choosing.
Choose windows by the climate where they will be installed, not by appearance alone. ENERGY STAR’s efficiency criteria vary by region and may change over time. Check the current regional requirements before comparing products. Numbers matter. Look for certified performance information, including U-factor and solar heat gain coefficient (SHGC), rather than relying on a sales description.
In colder areas, a lower U-factor can help reduce heat loss through the window. In sunnier regions, the right SHGC may limit unwanted summer heat while still allowing daylight indoors. Low-emissivity glazing can help manage heat transfer, but the best coating depends on local conditions and room orientation. A bright south-facing room may need different glazing from a shaded bedroom.
Frames matter, too. Compare whole-window ratings, since glass performance alone does not describe the complete unit. Insulated vinyl or fiberglass frames generally conduct less heat than metal frames without thermal breaks; wood can provide good insulation but needs suitable care. Ask how the frame, glazing, and spacers work together. It is tempting to choose the lowest U-factor everywhere, but that can overlook useful winter sun or local cooling needs. Installation quality also affects real-world performance, and it is easy to underestimate.
When comparing home windows, look beyond glass thickness and frame appearance. Check the performance label for compliance with AAMA/WDMA/CSA 101/I.S.2/A440, commonly called NAFS. It identifies tested performance, not a promise that every window will suit every house. Look for the product type, performance class, and performance grade. The class—such as R, LC, CW, or AW—signals the intended application range.
Pay close attention to the performance grade and design pressure. These figures reflect how a tested window handled structural loads; a larger number is not automatically the right choice for every opening. Confirm that the tested size and configuration resemble your planned window. A rating for a small fixed unit may not apply to a wide operable window. Check air leakage and water penetration results too. Water resistance is a tested threshold, not a guarantee against every storm or installation flaw. Details matter.
Match the rating to your home’s exposure, building height, and local requirements with a qualified window professional. Coastal wind, open terrain, and upper floors can change what is appropriate. I find labels easy to skim too quickly; that is a mistake worth catching. Ask for the test documentation when a sales sheet gives only a broad claim. A careful comparison beats choosing by appearance alone.
| Tip | Performance Dimension | What to Check | How to Use the Information |
|---|---|---|---|
| 1. Match the performance grade to the project | NAFS Performance Grade (PG) and product class | Check the tested PG and the class shown on the product documentation: R, LC, CW, or AW. These classes represent different intended applications and performance requirements. | Compare the documented rating with local code requirements and the building’s exposure. Do not choose by class name alone; confirm that the specific product meets the required PG. |
| 2. Confirm the exact tested configuration | Size, operating style, glazing, and options | Verify that the tested product configuration matches the window being quoted, including its dimensions, frame, glazing, opening type, and relevant hardware or reinforcement options. | A rating for one size or configuration should not automatically be assumed to cover every size or option in a product range. Request documentation for the configuration supplied. |
| 3. Understand the pressure rating | Design Pressure (DP), expressed in psf or kPa | Check the design pressure stated in the product’s NAFS documentation. For example, 30 psf is approximately 1.44 kPa. | Have the required pressure determined for the project using applicable building-code provisions and site conditions. A higher DP may be needed for more exposed locations or particular building conditions. |
| 4. Check water penetration resistance | Water test pressure and test result | Look for the stated water penetration resistance test pressure and whether the tested assembly met the applicable acceptance criteria. | Compare the documented result with project requirements, especially for wind-driven rain exposure. Water resistance is a separate consideration from the structural pressure rating. |
| 5. Review air leakage results | Air leakage rate and test conditions | Check the reported air leakage rate, its units (often cubic feet per minute per square foot), and the test pressure and applicable standard or edition. | Lower reported leakage generally indicates less air passing through the tested assembly under the stated test conditions. Compare like-for-like results and confirm applicable code limits. |
| 6. Consider operation and durability | Operating force, hardware, and product suitability | Confirm that the window type is suitable for its location and intended use, and review available documentation for operation, locking, and hardware performance. | Choose an operating style that can be used safely and maintained in its location. Consider access, ventilation needs, and whether hardware can be serviced or replaced. |
| 7. Verify installation and separate energy ratings | Installation details, U-factor, and solar heat gain coefficient (SHGC) | Request installation instructions and check energy-performance data separately from NAFS structural ratings. U-factor and SHGC describe thermal and solar performance, not structural strength. | Correct installation is essential for the assembly to perform as intended. Select energy ratings appropriate to the climate and project, and confirm that the installed product matches the rated configuration. |
Note: NAFS requirements and product classifications can vary by standard edition, product type, and applicable code. Confirm current project requirements and obtain test documentation for the specific window configuration under consideration.
Window ratings describe tested units, not every installed opening. The U.S. Department of Energy reports that heat gain and loss through windows account for about 25%–30% of residential heating and cooling energy use. A precise fit matters. A unit that is too large may bind; one that is too small can leave gaps for drafts, water, and rattling.
Tip: Measure each opening at the top, middle, and bottom, and use the smallest width and height. Check diagonals for squareness, plus frame depth and sill condition. Ask the installer to verify measurements before ordering. Measure twice. Older homes can still be irregular.
Compare whole-unit U-factor and solar heat gain coefficient, using standardized ratings from the National Fenestration Rating Council. During installation, check that the frame is level, plumb, and square, with flashing and perimeter seals properly fitted. A bead of caulk cannot fix a bowed frame. Afterward, open and close each sash, inspect the locks, and look for daylight around the edges. Ratings matter, but they do not guarantee workmanship.